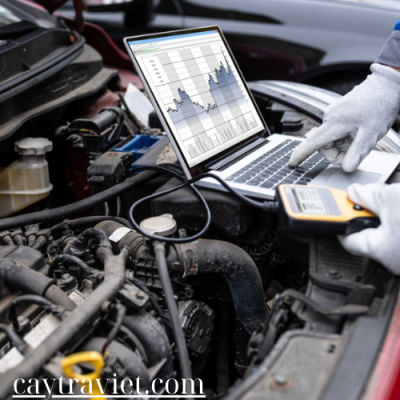
Maintaining your vehicle can help prevent costly repairs and keep it running smoothly for years. Whether you’re dealing with a flat tire, dead battery, or malfunctioning lights, having basic car repair knowledge can save you time and money. This guide offers step-by-step instructions for fixing some of the most common vehicle issues. Let’s get started!
1. Fixing a Flat Tire
Tools Needed:
- Jack
- Lug wrench
- Spare tire
- Wheel wedges (optional)
- Vehicle manual
Steps:
- Find a Safe Location: Pull over to a safe, flat area away from traffic. Turn on your hazard lights and apply the parking brake. Place wheel wedges behind or in front of the tires for extra stability.
- Loosen the Lug Nuts: Use the lug wrench to loosen (but not remove) the lug nuts on the flat tire by turning them counterclockwise.
- Lift the Vehicle with the Jack: Position the jack under the car’s frame, near the flat tire, following the guidelines in your vehicle manual. Raise the car until the flat tire is off the ground.
- Remove the Lug Nuts and Tire: Fully unscrew the lug nuts and remove the flat tire.
- Install the Spare Tire: Align the spare tire with the lug bolts and push it onto the hub.
- Tighten the Lug Nuts: Screw the lug nuts back onto the bolts by hand, then use the lug wrench to tighten them slightly.
- Lower the Vehicle: Use the jack to lower the car back onto the ground. Once the car is stable, fully tighten the lug nuts in a star pattern to ensure even tightening.
- Check the Spare: Ensure the spare tire has enough air pressure. Drive to the nearest mechanic to have the flat tire repaired or replaced.
2. Replacing a Dead Car Battery
Tools Needed:
- Wrench set
- New car battery
- Gloves and safety goggles
Steps:
- Turn Off the Engine: Ensure the vehicle is turned off and parked on a flat surface. Open the hood and locate the battery (refer to the owner’s manual if necessary).
- Disconnect the Negative Terminal: Using a wrench, loosen the bolt on the negative terminal (marked with a minus sign or black cover). Disconnect the negative cable and move it aside.
- Disconnect the Positive Terminal: Loosen the bolt on the positive terminal (marked with a plus sign or red cover) and disconnect the positive cable.
- Remove the Battery: Unscrew the bracket or clamp that secures the battery in place. Lift the old battery out of the vehicle carefully (batteries can be heavy).
- Install the New Battery: Place the new battery in the same position, making sure the positive and negative terminals align correctly.
- Reconnect the Positive Terminal: Attach the positive cable to the new battery’s positive terminal and tighten the bolt.
- Reconnect the Negative Terminal: Attach the negative cable to the negative terminal and tighten the bolt.
- Secure the Battery: Tighten the bracket or clamp to secure the battery in place.
- Test the Battery: Start the car to ensure the new battery is working properly.
3. Replacing Windshield Wipers
Tools Needed:
- New wiper blades
- Vehicle manual (for specific wiper blade sizes)
Steps:
- Lift the Wiper Arms: Pull the wiper arms away from the windshield until they lock in a raised position.
- Remove the Old Wiper Blades: Look for a small tab at the connection point of the wiper blade and the wiper arm. Press the tab and slide the old blade off the arm.
- Install the New Wiper Blades: Align the new blade with the wiper arm and slide it into place. You should hear a click when it’s securely attached.
- Lower the Wiper Arms: Gently lower the wiper arms back onto the windshield.
- Test the Wipers: Turn on the wipers to ensure they work smoothly.
4. Jump-Starting a Car
Tools Needed:
- Jumper cables
- A second vehicle with a working battery
Steps:
- Park the Cars: Park the working car next to the dead car, ensuring both vehicles are turned off. Open the hoods and locate the batteries.
- Attach the Jumper Cables:
- Connect the red clamp to the positive terminal of the dead battery.
- Attach the other red clamp to the positive terminal of the working battery.
- Connect the black clamp to the negative terminal of the working battery.
- Attach the other black clamp to an unpainted metal surface on the dead car (away from the battery) to ground the circuit.
- Start the Working Vehicle: Let the working car run for a few minutes to charge the dead battery.
- Start the Dead Vehicle: Try to start the car with the dead battery. If it starts, let both cars run for a few minutes.
- Disconnect the Cables:
- Remove the black clamp from the grounded surface.
- Remove the black clamp from the negative terminal of the working battery.
- Remove the red clamp from the positive terminal of the working battery.
- Remove the red clamp from the positive terminal of the dead battery.
- Run the Car: Let the newly charged car run for at least 15-20 minutes to recharge the battery.
5. Replacing a Headlight Bulb
Tools Needed:
- New headlight bulb
- Screwdriver (optional)
- Gloves
Steps:
- Turn Off the Car: Make sure the car is turned off and the headlights are cool to the touch.
- Access the Headlight: Open the hood and locate the back of the headlight assembly. You may need to remove the dust cover or other components (check your manual).
- Remove the Old Bulb: Turn the headlight bulb socket counterclockwise to remove it. Disconnect the electrical connector from the bulb.
- Install the New Bulb: Hold the new bulb by the base (avoid touching the glass part with your fingers) and connect it to the electrical socket. Insert it into the headlight assembly and turn it clockwise to secure it.
- Replace the Dust Cover: If you removed any covers or components, reattach them.
- Test the Headlight: Turn on the headlights to ensure the new bulb is working properly.
6. Changing Engine Oil
Tools Needed:
- Oil filter wrench
- Socket wrench set
- Drain pan
- New oil filter
- New engine oil (check your vehicle manual for the correct type)
Steps:
- Warm Up the Engine: Let the engine run for a few minutes to warm up the oil, making it easier to drain.
- Raise the Car: Use a jack to raise the front of the vehicle and secure it with jack stands.
- Drain the Old Oil:
- Place the drain pan under the oil pan.
- Use a socket wrench to remove the drain plug from the oil pan.
- Let the oil drain completely into the pan.
- Replace the Oil Filter:
- Use the oil filter wrench to remove the old oil filter.
- Apply a small amount of new oil to the rubber gasket of the new filter.
- Screw the new filter in place by hand.
- Replace the Drain Plug: Once all the oil has drained, replace the drain plug and tighten it with a socket wrench.
- Add New Oil: Remove the oil cap from the engine and pour in the new oil using a funnel. Check your manual for the correct oil type and quantity.
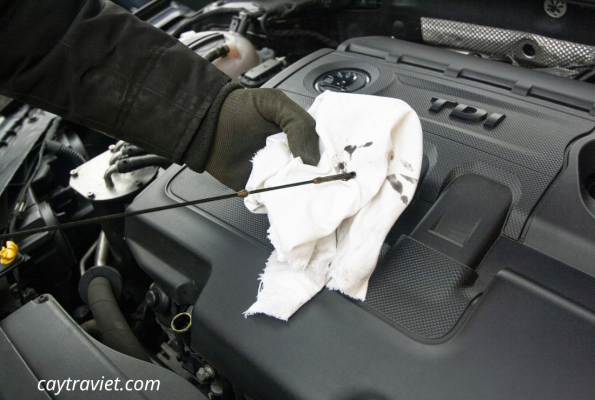
- Check Oil Level: Use the dipstick to ensure the oil level is correct. Add more oil if necessary.
- Lower the Car and Test: Lower the vehicle and run the engine for a few minutes. Check for leaks and recheck the oil level.
Conclusion
With basic car repair knowledge and the right tools, you can tackle many common vehicle issues on your own. Regular maintenance, such as changing oil and replacing worn parts, will keep your car running smoothly and extend its lifespan. By following these step-by-step guides, you’ll be prepared to handle some of the most frequent car problems with confidence.


